Why Washing Machine Filters Need Regular Cleaning
The pump filter — also called the drain filter, coin trap, or debris filter — is one of the most overlooked yet most important maintenance components in any washing machine. Its job is to catch small objects and fibres before they reach the drain pump: coins, hair clips, lint, buttons, small garments, and accumulated fabric fibres all end up here over time.
When the pump filter becomes clogged, the consequences are progressive and costly. In the early stages, you may notice clothes coming out less clean, or water draining more slowly at the end of a cycle. As the blockage worsens, the machine may produce error codes, refuse to drain entirely, or — in severe cases — develop a leak as pressure builds up behind the blocked filter housing.
The "native" cleaning method described in this guide uses only water and a soft brush — no specialist cleaning tablets, chemical descalers, or proprietary products. This approach is safer for the filter materials, kinder to the environment, and just as effective for routine maintenance. We recommend cleaning the pump filter every 2–3 months as standard, and immediately if you notice any of the warning signs described above.
Before You Begin — What You Will Need
A shallow tray or baking dish, 2–3 old towels or thick cloths, a soft-bristled brush (an old toothbrush works perfectly), a bucket, and access to a tap. No tools or special knowledge required.
Locating Your Washing Machine Filter
Filter location varies by machine type and manufacturer. On most front-loading machines sold in Japan and Europe, the pump filter is located behind a small access panel on the lower front of the machine — typically at the bottom right corner. The panel may be a push-to-open flap, a small door secured with a tab, or (less commonly) a panel that requires a flat-blade screwdriver to open.
On top-loading machines, the lint filter is usually located inside the drum (often integrated into the agitator column in the centre), or on the rim of the drum. Some top-loaders have a second pump filter behind a lower access panel similar to front-loaders. Consult your machine's manual if you cannot locate it.
Step-by-Step Filter Cleaning Guide
Step 1
Run a Short Drain Cycle First
Before attempting to open the filter housing, run a Drain & Spin cycle (or the shortest spin-only cycle available on your machine). This ensures the drum is empty of water and reduces the amount of water that will flow out when you open the filter cap. On most machines this cycle takes 5–8 minutes.
Once the cycle is complete, switch the machine off at the power button and then unplug it from the mains socket. Never work on the filter with the machine plugged in.
Step 2
Prepare for Water Spillage
Even after a drain cycle, there will always be some residual water in the filter housing — this is normal and expected. Lay two or three folded towels on the floor directly in front of the access panel. Place a shallow baking tray or roasting dish directly under the filter cap location — this will catch the initial flow of water when the cap is loosened.
Have your bucket ready nearby for emptying the tray as needed. If your machine has a small drain hose beside the filter cap (many Panasonic and Hitachi models do), you can use this to drain the residual water in a more controlled manner before removing the main filter cap.
Step 3
Open the Access Panel
With your tray and towels in position, open the lower front access panel. Most panels open by pressing a small recessed tab or by inserting a fingernail or coin into a slot and pulling forward. The panel typically hinges downward or lifts off completely.
Inside, you will see the filter cap (a circular plug, usually with a handle or ridged grip), and often a small black drain hose approximately 10cm long with a cap on the end. If present, pull out this small drain hose, remove its cap, and hold it over your tray to allow residual water to drain out slowly. This controlled pre-drain dramatically reduces the amount of water that spills when you later open the main filter.
Step 4
Removing the Filter
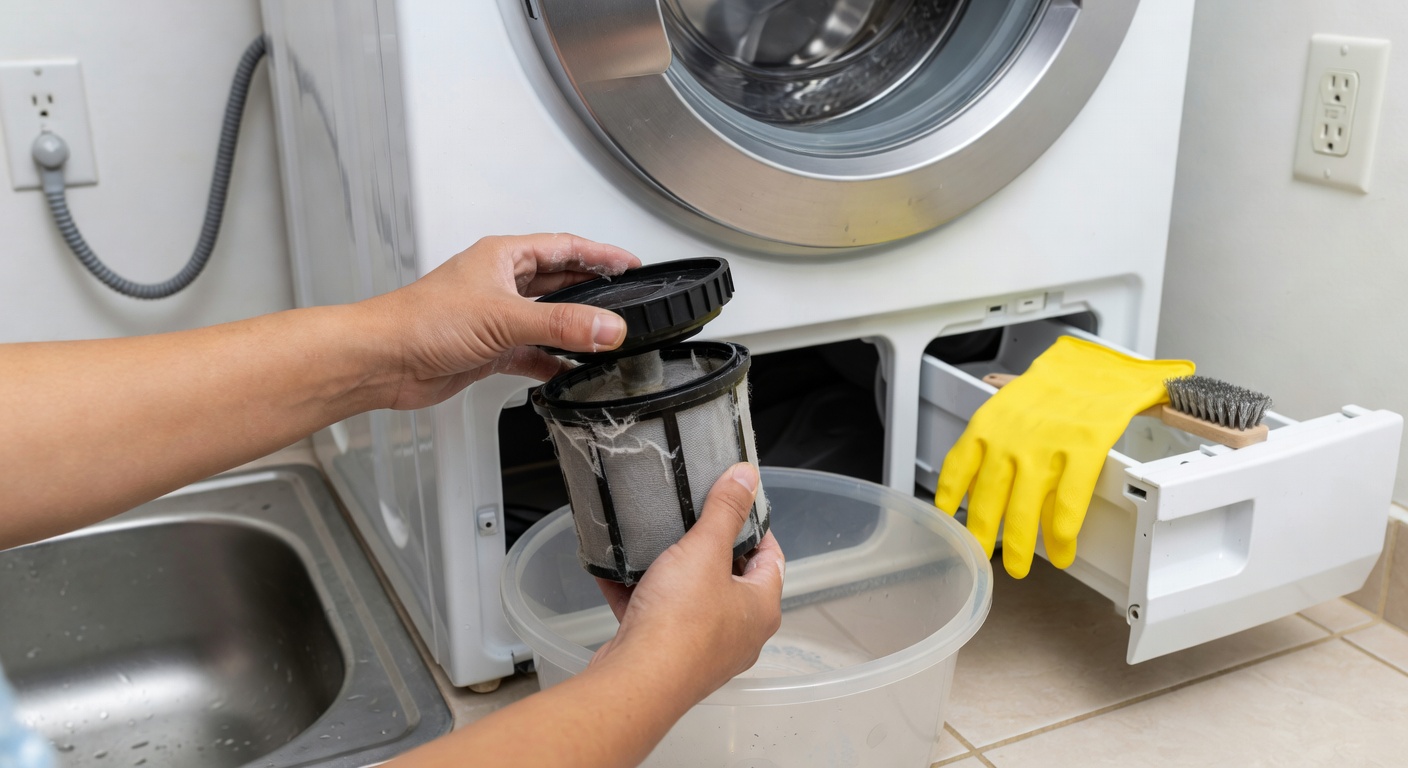
With the tray in position, grip the filter cap and turn it anticlockwise (counter-clockwise) slowly. Do not remove it fully in one motion — turn it just enough to break the seal (usually about a quarter turn), then pause and allow water to flow into the tray. Once the flow slows to a trickle, continue turning until the filter cap is free.
On most machines the filter screws out with 2–3 full anticlockwise turns. Some models have a bayonet fitting that requires a quarter turn and then a pull. The filter itself is the cylinder or disc attached to the inside of the cap — it will come out with the cap as a single unit on some machines, or separately on others.
Tip the filter and cap over the tray to drain any remaining water from inside the housing. Set both pieces aside on a towel.
Step 5
Rinsing the Filter
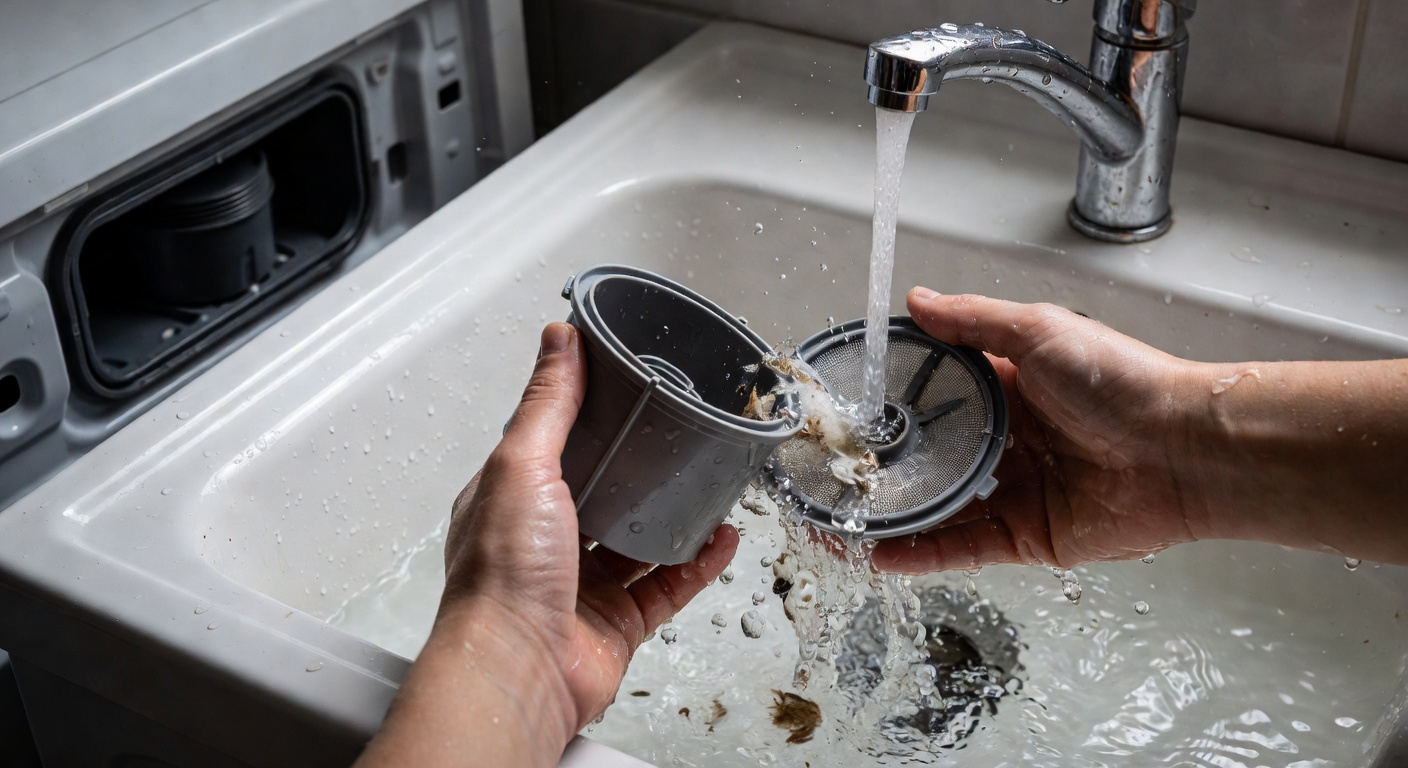
Take the filter to your sink or bathtub. Hold it under warm running water and use your fingers to pull away any visible debris — lint, hair, fabric fibres, coins, and small objects. Once the major debris is removed, use a soft-bristled brush (an old toothbrush is ideal) to scrub between the mesh fins or filter blades.
Work the brush in short strokes from the centre outward, rotating the filter as you go. You will likely see grey or brown discoloured water running off — this is normal. Continue rinsing and brushing until the water runs clear and the filter looks visually clean.
Checking the mesh: Hold the filter up to a light source and look through the mesh from the clean side. Every cell should allow light through. If any sections remain blocked after brushing, soak the filter in warm water for 10 minutes and try again. For very stubborn limescale deposits, a brief soak in a 50:50 mixture of white vinegar and water will dissolve mineral build-up without damaging the filter.
Inspect the filter housing: While the filter is out, use a damp cloth to wipe around the inside of the filter housing cavity in the machine. Remove any debris you can see or feel at the back of the cavity. Check that the rubber seal (O-ring) around the housing opening is clean, intact, and correctly seated — a damaged seal is the primary cause of post-maintenance leaks.
Common Mistake — Do Not Do This
Do not use harsh chemical cleaners, bleach, or boiling water on your filter. These can warp the plastic housing, damage the rubber sealing ring, and cause leaks. Warm water and a soft brush are all you need.
Step 6
Inspect and Clean the Filter Housing
With the filter removed, shine a torch into the filter housing cavity. You may find additional lint, hair, or small objects lodged at the back of the cavity against the pump inlet. Use your fingers or a long pair of tweezers to carefully remove anything you find.
Wipe the inside of the cavity walls with a damp cloth. Pay particular attention to the threaded section where the filter cap screws in — old lint and detergent residue can accumulate in the thread grooves and prevent a good seal when you reinstall the filter.
Check the rubber O-ring seal carefully. It should sit evenly in its groove without any twisting, cracking, or compression damage. If the O-ring is deformed or cracked, it must be replaced before the filter is reinstalled — a damaged O-ring will cause a leak every time the machine runs. Replacement O-rings for most machines are inexpensive and available at hardware stores or online.
Step 7
Reinstall the Filter
Once the filter is clean and the housing is inspected, reinstall the filter cap by inserting it and turning clockwise until hand-tight. Do not overtighten — this can damage the O-ring and the thread. The filter should feel firm and secure with no movement when you try to push or pull it. If your machine had a separate small drain hose, recap it and push it back into its storage clip.
Close the access panel. Wipe up any water that spilled during the process and remove the towels from the floor.
Step 8
Run a Short Test Cycle and Check for Leaks
Plug the machine back in and run a short rinse cycle (Rinse & Spin is ideal). During the first minute of the cycle, check around the base of the machine and around the filter access panel for any signs of water leakage. A correctly installed filter with an intact O-ring should produce zero leakage.
If water does appear around the filter area, immediately stop the machine and unplug it. Open the access panel, remove the filter, check that the O-ring is correctly seated and undamaged, and reinstall. If leaking continues after reinstallation, the O-ring requires replacement.
On a successful test cycle with no leaks, your cleaning is complete. Note the date in a household maintenance log so you know when the next cleaning is due.
Warning — Signs Your Filter Needs Immediate Attention
Do not wait for the scheduled maintenance date if you notice: slow draining at end of cycle, clothes coming out wetter than usual, a burning or rubber smell during operation, error codes E21/F21/Drain, or visible water pooling under the machine.
How Often Should You Clean the Filter?
For a typical 2–4 person household: every 2–3 months. For households with children, pets, or where towels and heavy items are washed frequently: monthly. For single-person households with light laundry loads: every 3–4 months. When in doubt, check it — it only takes 10 minutes.
Related Articles
Advertising supports our free editorial guides.